Mercedes SLK World banner
Status
Not open for further replies.

DIY: Custom trunk inserts

17K views 26 replies 20 participants last post by  H10HHE  
#1 · (Edited by Moderator)
Image


This cost under $30.00 to do.
Items needed for install:
Pencil
Paper
Scissors
Thin cardboard
Painters Tape
Hot melt glue gun
Fabric of choice....1/2 yard of fabric 1/2 yard of 1/2 inch batten or filler
It uses about 1/4 of a yard but you have extra for mistakes or redoing
another trunk. Just use Faux Fabric. Its cheaper.
Faux Leather, Suede, Emu, Alantra, ect from your fabric store.

Plan a couple of hours

Image


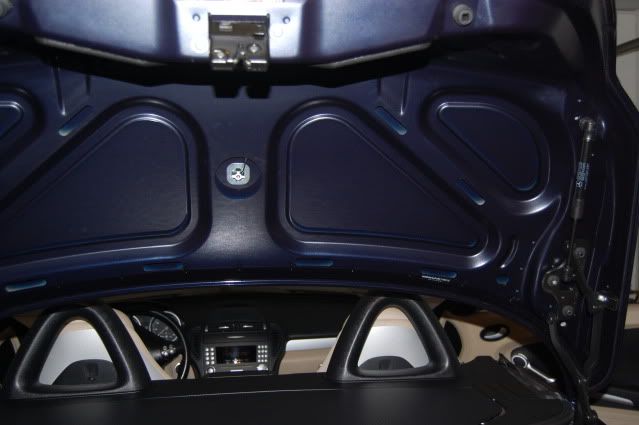
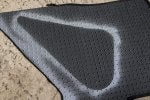
Tape paper over the large and small areas you want to make inserts for.
Image

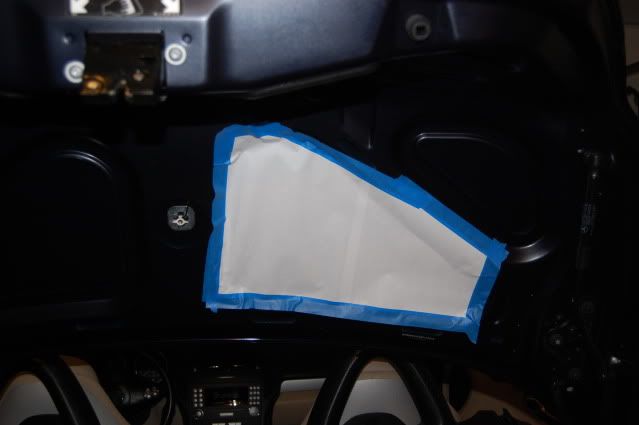
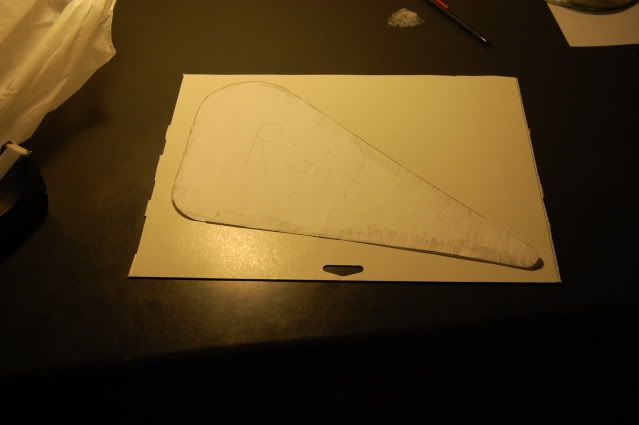
Using the side of the pencil lead, trace the lip of the trunk lightly going back and forth. You will see the line form in the paper. Dont press too hard.
Image


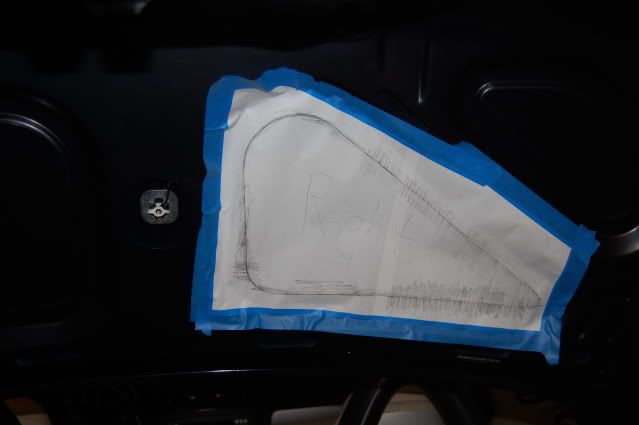
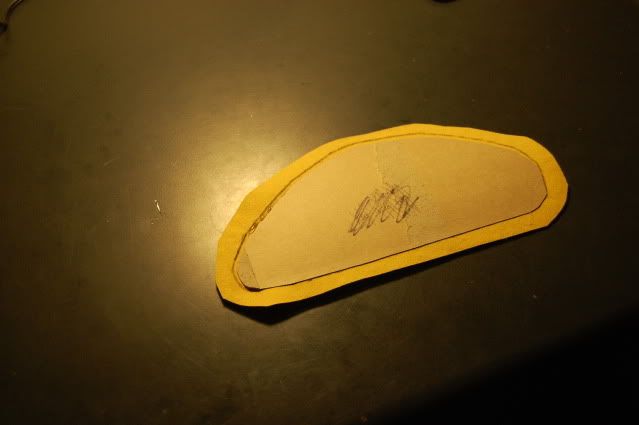
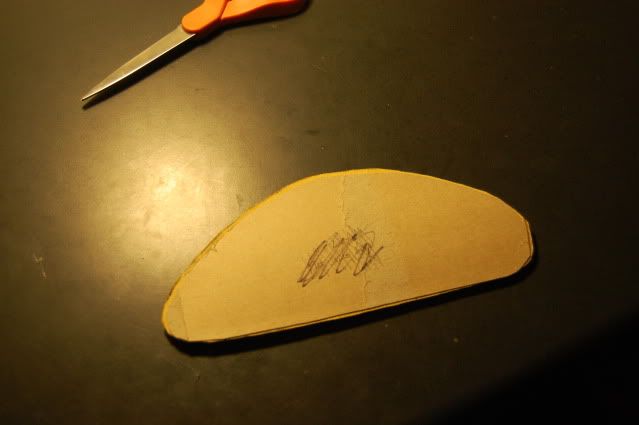
Carefully remove the paper and cut out the traced area on the line and trace onto the thin cardboard. On one side of the paper mark it Right and on the other side mark it left. This way you only have to trace 1 small and 1 large.
Image

Image

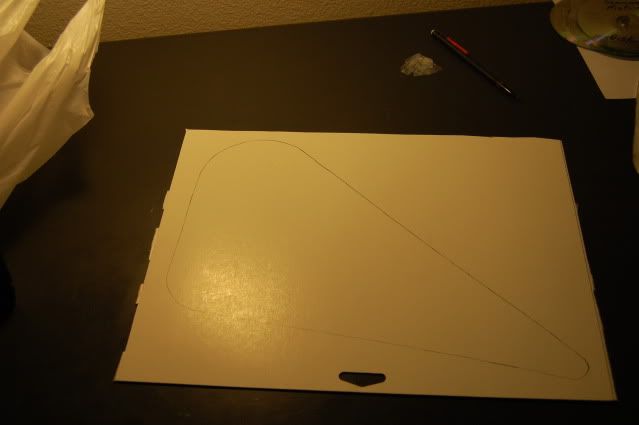
Next you need to cut out the template. When you do this, you need to cut the cardboard 1/4" larger. This is what holds it in place in the trunk.
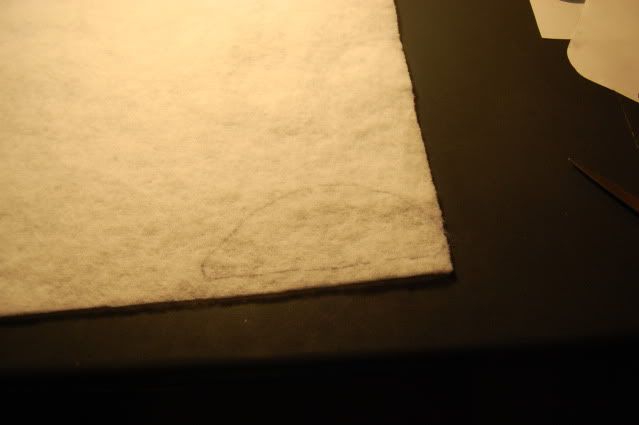
Trace the batten using the paper pattern you made and cut it out.
Image


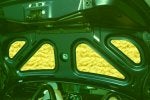
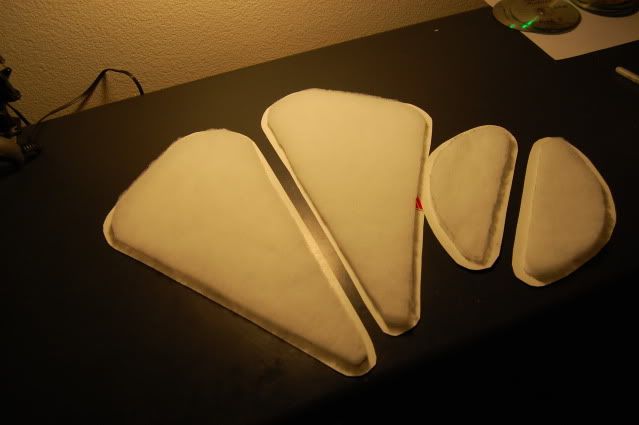
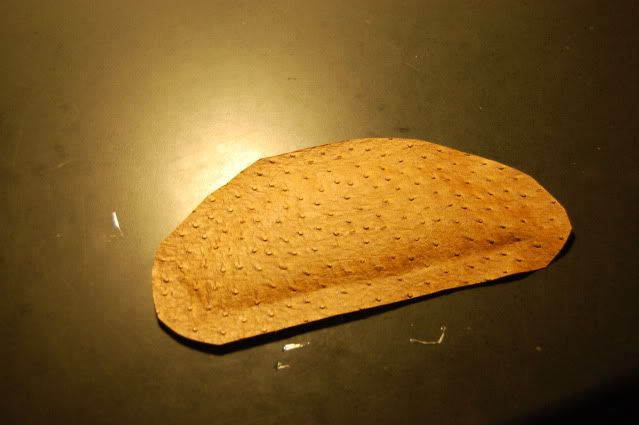
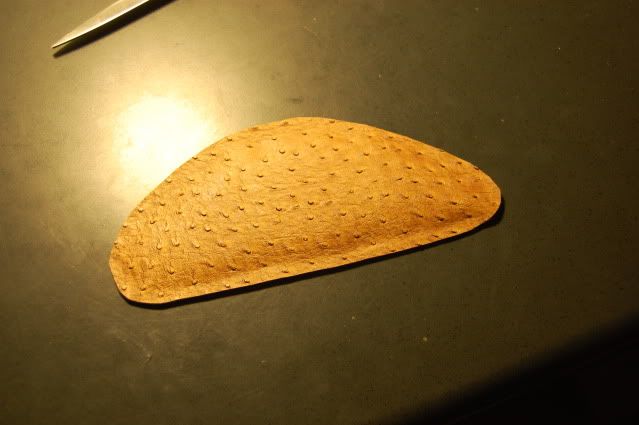
Apply hot melt glue to the thin cardboard and then put the filler in place and let it cool. This is what yours should look like. You can use 2 layers if you want a puffy look if you are using a thin fabric.
Image

Using the template, trace on the back side of the fabric. Trim fabric leaving a 1/4" surplus all around.
Image


Turn the cardboard facing up with the batting. To get a good seal, apply the hot melt glue to the middle of the 1/4" surplus with a single bead of glue. Quickly put the fabric over the batting and press the fabric into the glue all the way around. Should look like a Calzone. LOL
Image


Now trim off the excess fabric back to the cardboard.
Image

Image


Now your ready for the install.
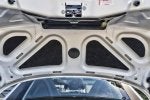
Take the insert and cup it a little bit. Slip the insert into the recessed area starting with the small corners and slowly work your way around until the insert pops in. Keep watching as you go. You might have to trim a little as you go so it fits. Take your time here, don't cut too much or it won't cover the entire hole when it pops into place.
Image

Image


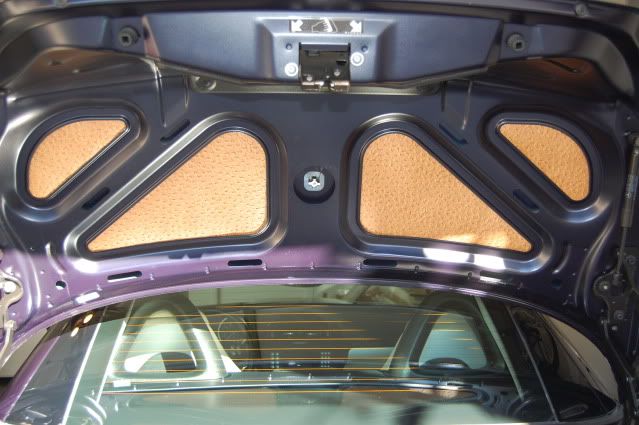
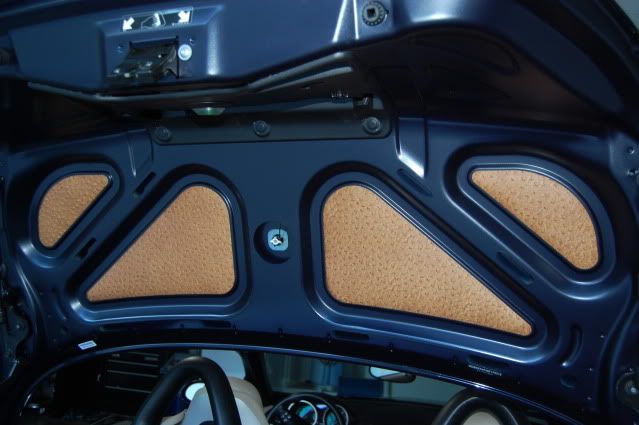
I used faux Emu like the Spyker autos used. Its really unique.
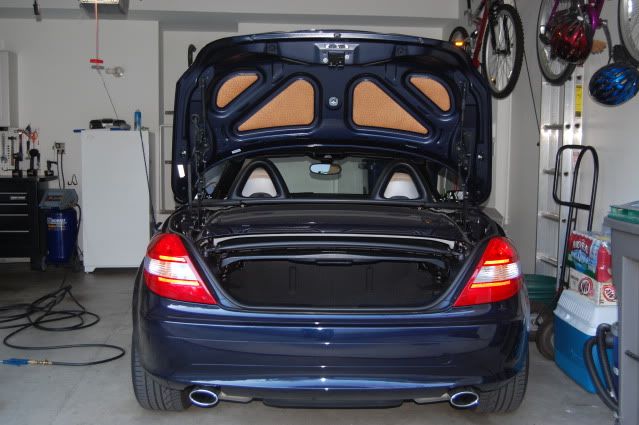
The end product looks great!!! Enjoy
Please post pics of your custom trunk inserts
Thank you....Jerry
 
#2 · (Edited by Moderator)
Trunk/Boot Lid inner foam inserts

I did something similar quite a while ago in terms of getting the pattern, but did not post as I didn't think it was of interest to others. I also covered the round hole that houses the satellite radio antenna with the same material.

I used 1/2-inch thick (3/4-inch will work also) flat packing urethane foam sheets (grey colour) found in packing fruits or electronic parts and equipment. I used a heated hobby knife (soldering iron with a special attachment for blade #11 hobby knife) to effect a clean cut on the foam. The cut foam is then inserted unto the triangular and round spaces. The grey foam makes it look OEM.

Hope the photos help:

Image


Image


Image
 
Save
#14 · (Edited by Moderator)
Materials and Tools photo, pdf file of pattern

To better illustrate the trunk lid inner lining foam inserts, I've included a photo of the 0.5-inch thick foam sheet , heated knife to effect a clean cut, and the pattern; green urethane foam may be available from the local grocer :)

Image


.....
I'll see if I can convince Louise to plot out some templates and post 'em up.
I've also attached the scanned pattern for the 2 triangles in pdf format (print at 100%) to save members some time (just flip the pattern to create the mirror-image for the other side). The large triangle is split into two scanned images with 3 lines drawn as an aid in aligning the pattern; these two pieces can then be taped together. The pattern takes into account (i.e., included) the 1-cm lip of the areas-of-interest.

If one is following CaliCoop's method, then allow 1-cm less space all-around for the inner batten/filling.

Some minor trimming or fine-tuning may be required in the final fitting, as stated by CaliCoop.
 

Attachments

Save
#5 ·
Me Too!!!! Thanks CaliCoop. I like them both as well, but I'm gonna have to ponder on the fabric/foam choices.
 
Save
#8 ·
I agree with you woolly. however I have always been concerned that if something was too big in the boot and I didnt notice and closed the boot I could dent (inverse dent) the boot lid.

The fixes above should stop that from happening.
 
#13 ·
Thanks for Sharing

These both look great! Thanks for the step by step! Once it gets warm and I get enough ambition, I might just be taking a trip to the fabric store! I like the look. It adds just enough to finish off the trunk lid! I like the ostrich pattern and the contrasting color.
 
#19 ·
I think this is very cool. Those of you who have done it, made it look very professional.

The only reason I'm not tempted yet is I don't know if the remainder of a R171 trunk/boot looks nice enough to warrant such a luxurious treatment. :)
 
Save
#20 ·
Trunk inserts

Did mine last Fall. Really very easy DIY project. Make yourself a template and cut out your material (I used black floor mat material). Properly sized "inserts" don't even require mastic to stay in place. I think it adds a finished look. :nerd:
 

Attachments

#21 ·
7 year old thread ....... :) Still relevant though! :)
 
Save
#23 ·
I fixed the broken Photobucket links, where it was possible to do so... Unfortunately, our 'fix' for the links in post 1 didn't work... perhaps @CaliCoop has removed them from his Photobucket account (or made the folder they're in non-public), since PB introduced their restrictions last year.

@CaliCoop - If that's the case, and if you want to make the PB folder public again, just let me know (either PM me or reply with QUOTE button here) and I'll have another attempt at 'fixing' your pics in post 1.

Edit: Looks like it's only the first pic that didn't work... the rest are now 'fixed' (thanks Jeff) ;)
 
  • Like
Reactions: mike350
Save
#26 ·
Nice resurrection of an old thread.

Something to consider doing during these dreary winter days. If I do anything (if being the operative word here), anyone know if the 171 insert pattern (per the pdf previously attached) will fit the 172?

I'd also consider adding some reflective tape either in strips or cover the whole thing (such as when opening the trunk at night on a highway).

Something like this would look good with the black during the day or reflective at night
Image

https://www.amazon.ca/Hawk-Ultra-Hi...dp/B002G7L84M/ref=pd_sbs_201_6?_encoding=UTF8&psc=1&refRID=2Q596ST4AKP2RNMYJDDT
 
#27 ·
Boot/trunk lid sound proofing...

I have felt for some time the boot lid when closed sounded very metalic and the interior is a bit industrial looking, so I filled the gaps using a yoga mat cut to shape £7.00 purchased from our local Aldi and secured with clear sealant. I am very pleased with the results, then I found this thred, duh, great minds etc....:grin:......A quick mod. well worth doing.
 
Status
Not open for further replies.
You have insufficient privileges to reply here.