I finally got to my dreaded air recirculation problem.
I have mentioned the problem here:
http://www.slkworld.com/slk-r170-general-discussion/31713-what-does-first-notch-aircon-do.html
And after writing this post and posting pictures of all the stuff I could find (Hope it's useful anyways) I came up with the solution over here:
http://www.slkworld.com/slk-r170-general-discussion/11844-vacuum-leak.html
I took the glovebox apart and took some pictures. The problem that I had is that my "housing door" is stuck on "always fresh air".
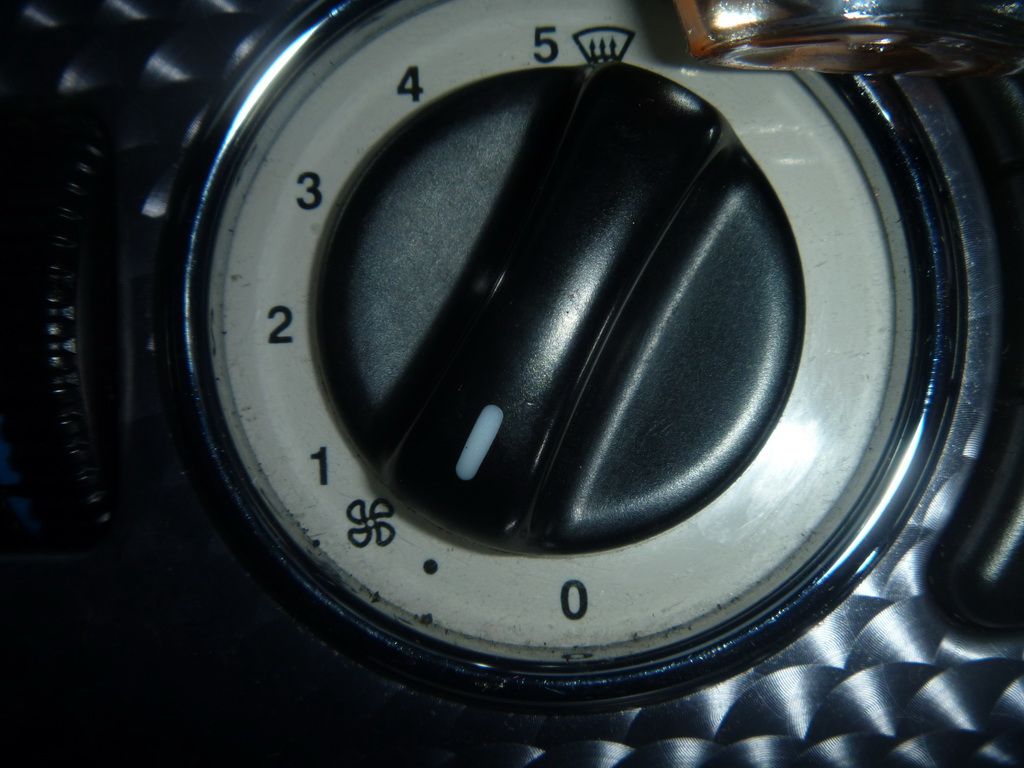
On the air conditioning switch there are the following measurements: "0", "." (dot), "1", "2", "3", "4", "5".
"0" - means inside the cabin air only. It is activated by the vacuum Element.
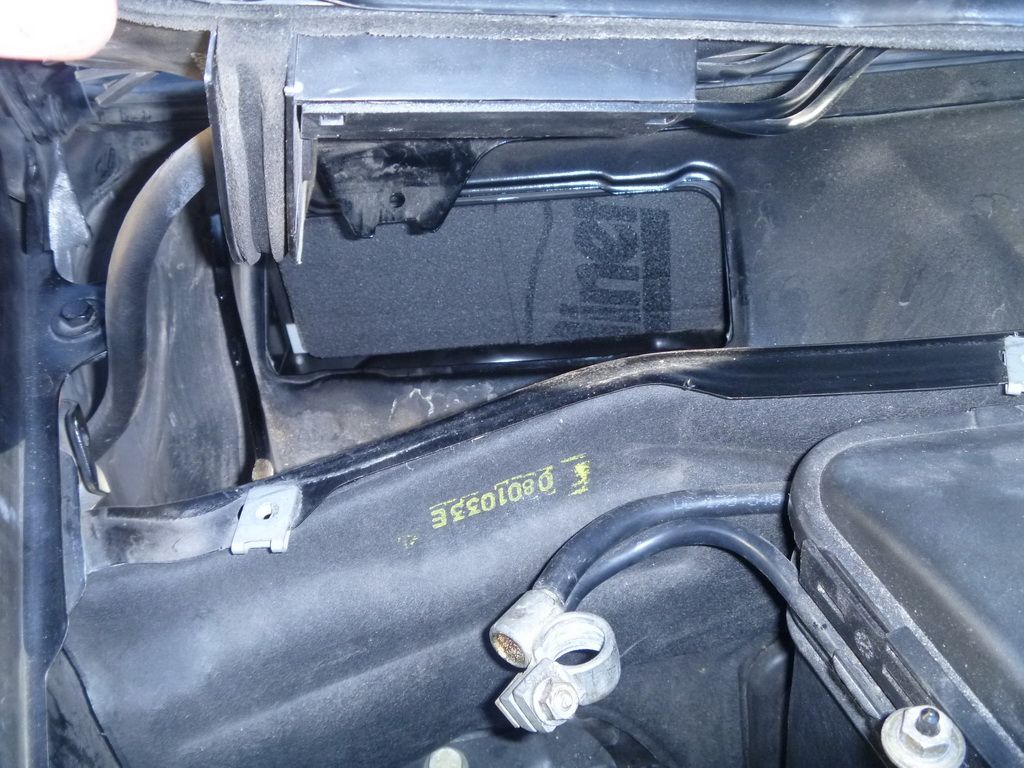
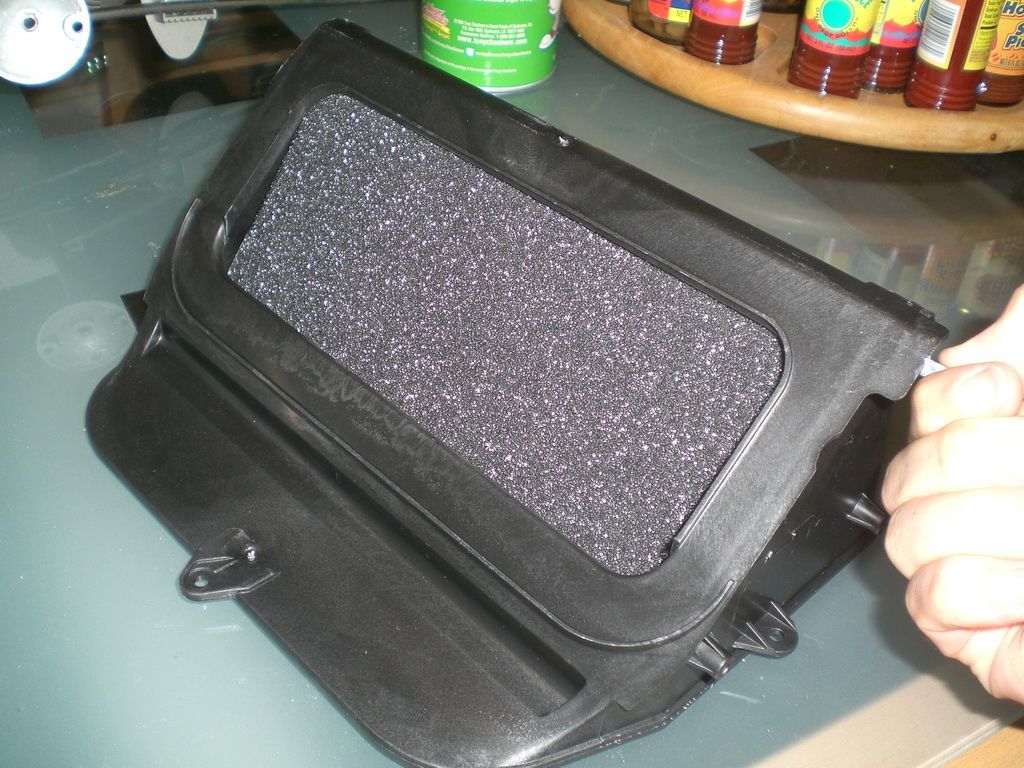
Here's the position of the housing door at "0"
![Image]()
. - means fresh air circulation. It is activated by the spring, while the vacuum is being released from the element.
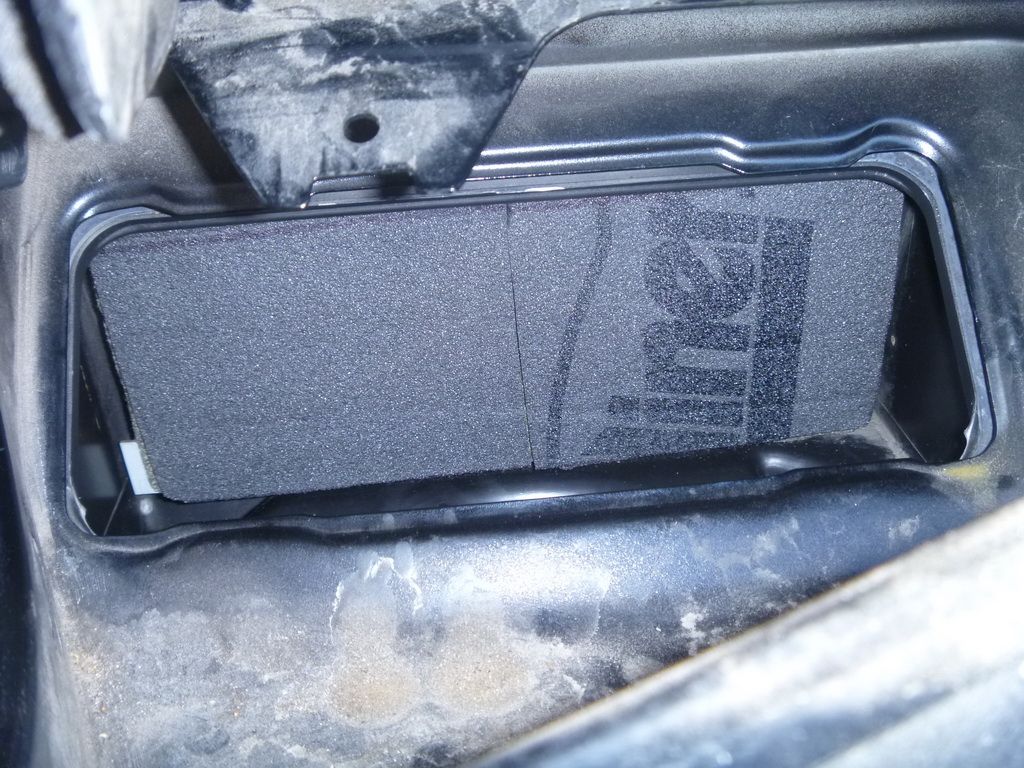
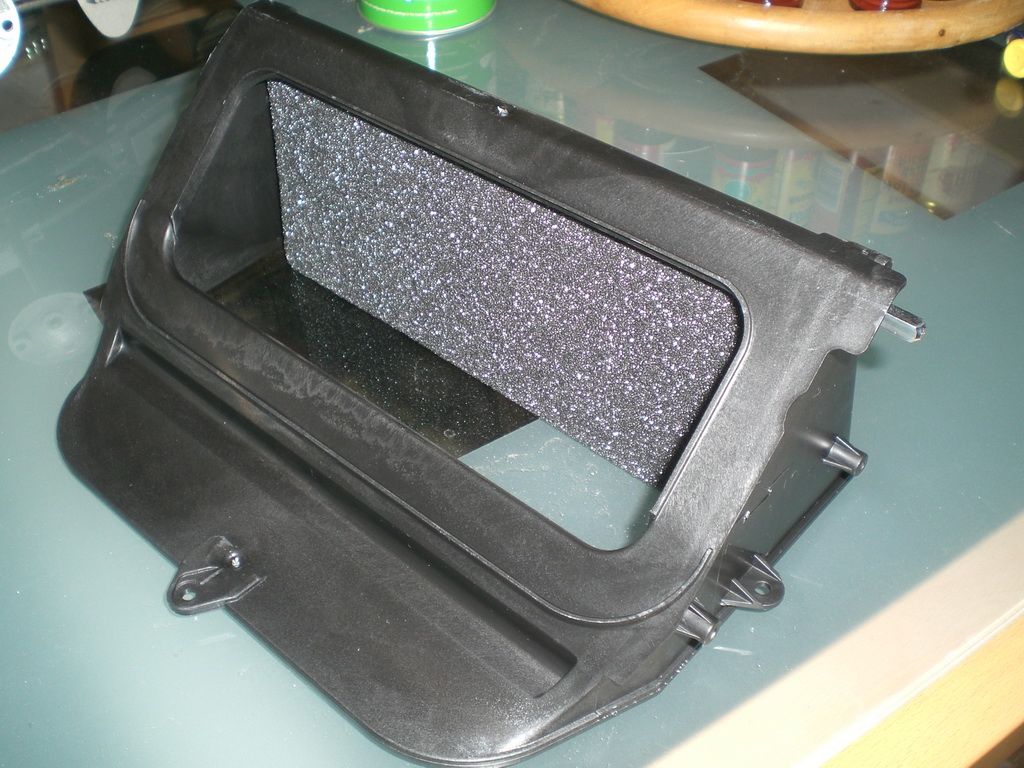
Here's the position of the housing door at "."
![Image]()
So, my flap was stuck on "." - Only fresh air.
![Image]()
Now, what happens is that there's a part called "Vacuum Element" (part no. 202-800-18-75) is made of rubber and over the time this rubber wears out. It causes a leak, so the vacuum is not created. There's no faulty code since this part is simply a rubber with attached metal piece to it which in its turn attaches to the small manual motor and operates it. Thus opening the "housing door" to allow fresh air or simply closing it - air inside the cabin only.
The part that pumps out the air from the vacuum element is called "Fresh/recirculating air flap switchover valve" (part no. 2028000178). This might generate a faulty code when it's out. But mine was fine. It was just going crazy, clicking all the time due to constantly sucking the air out of the faulty vacuum element.
NOTE: When you turn off the engine, the flap automatically goes into position "0" - fresh air. It is done automatically to release the vacuum and the tension applied to the vacuum element, and also to prolong its life. So my recommendation is to keep your switch in position "0", and don't turn it off all the way to "."(in cabin air only). In order to prolong the life of the element I would recommend to use "." position (in cabin air only) only when you really need it.
The symptoms:
When I was starting the car, turned the switch between these two positions, I heard a click form the "Fresh/recurc air flap switchover valve." Also, when it was in position "." - there was no sound, but in position "0" I heard a hissing sound...
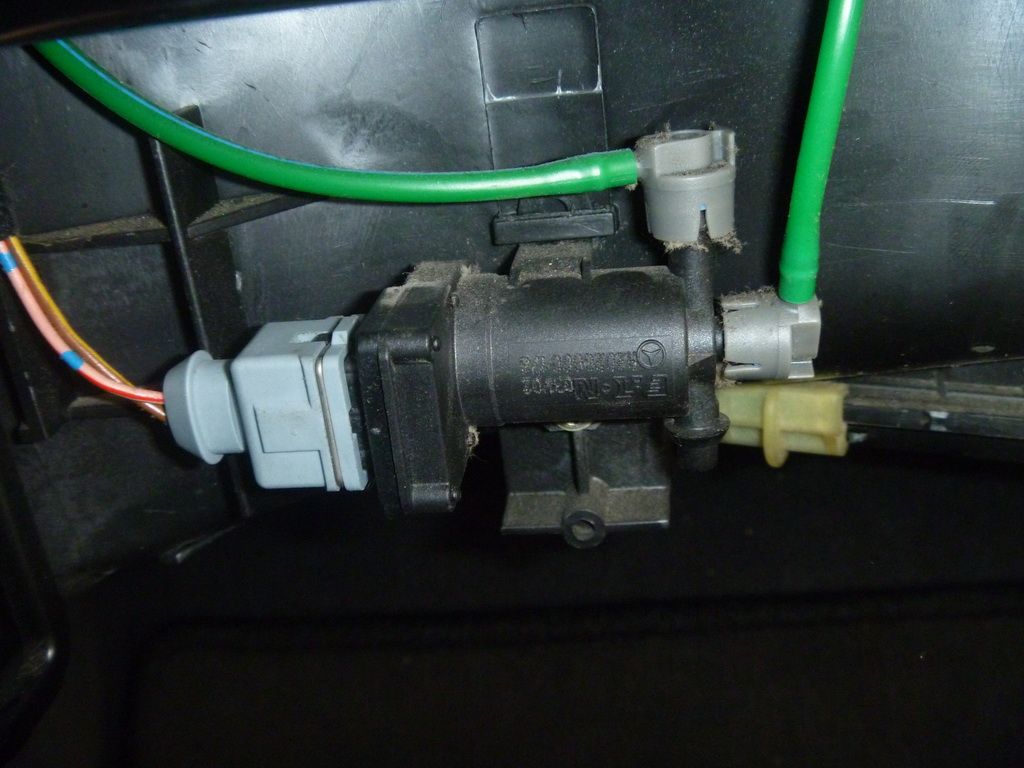
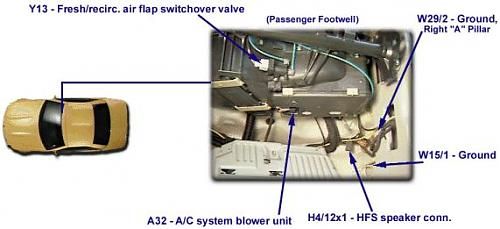
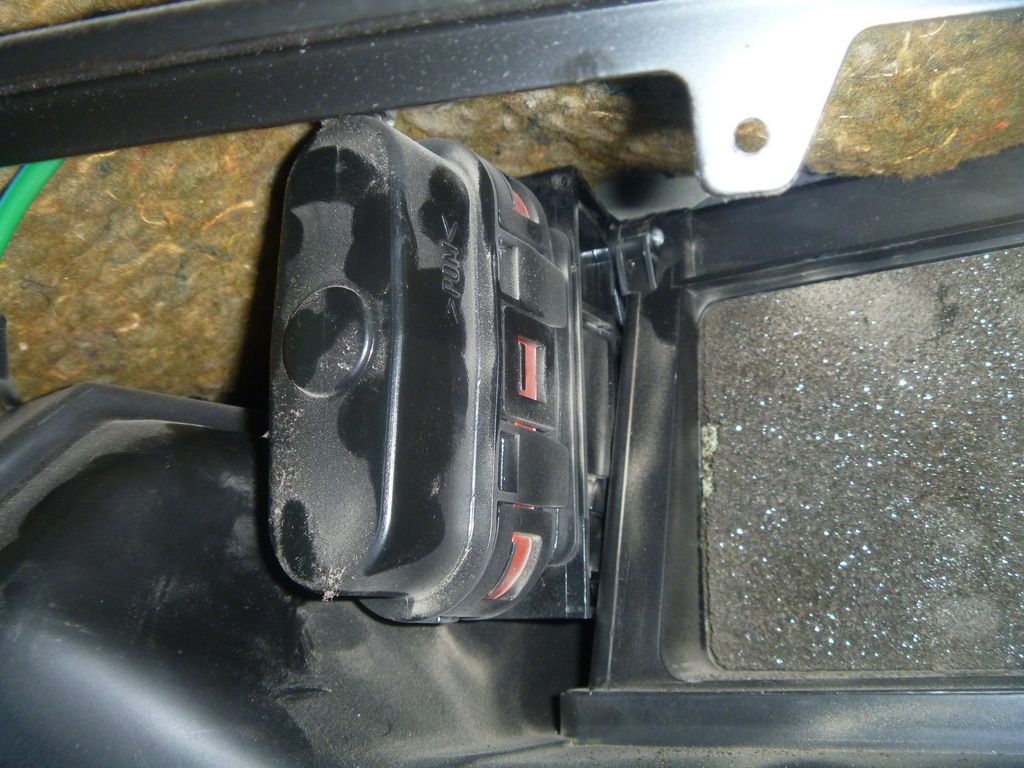
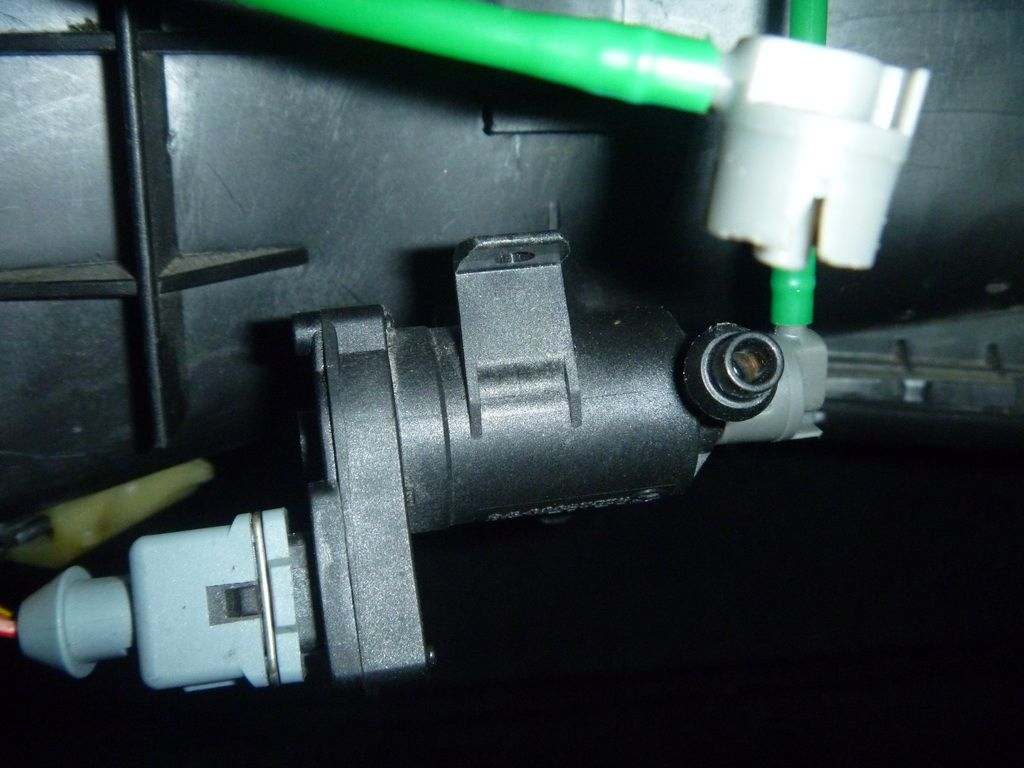
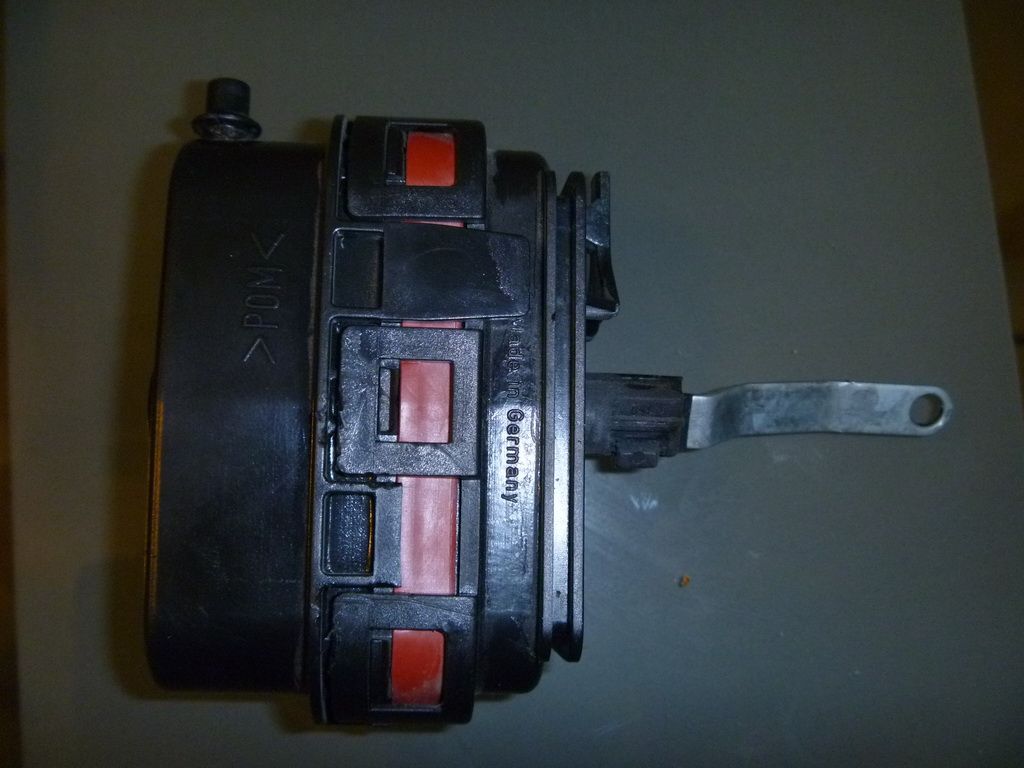
Here's a picture of the "Fresh/recurc air flap switchover valve":
![Image]()
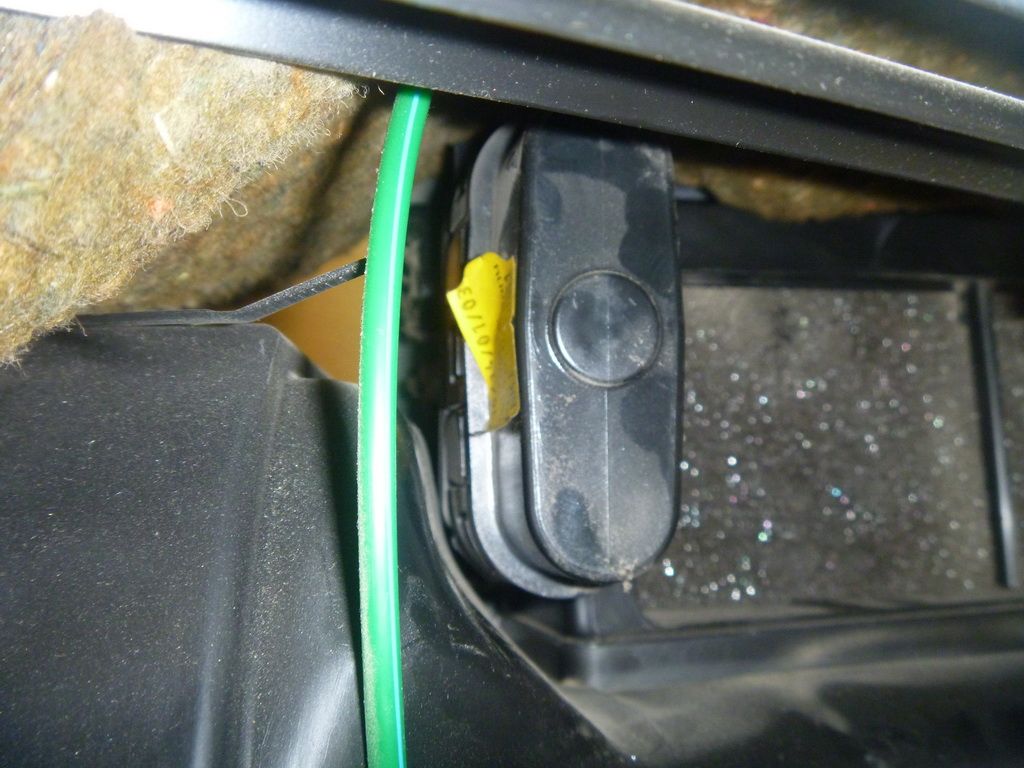
depicted also here:
![Image]()
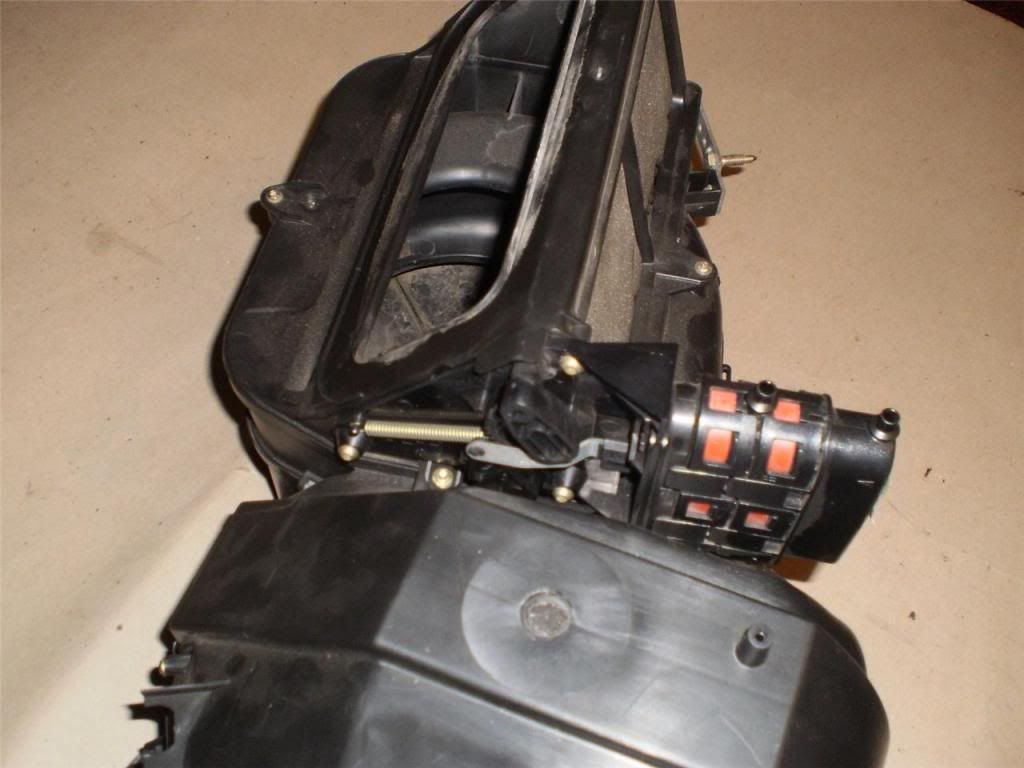
But the "housing door" didn't open. I saw that the vacuum was there. When playing with the switch I heard a vacuum sound from this "Fresh/recurc air flap switchover valve", the lines were moving, and the "Vacuum Element" (part no. 95 on the diagram below) depicted below was moving too, meaning it was getting the vacuum. But I heard a hissing sound, meaning that the rubber developed a tear somewhere.
![Image]()
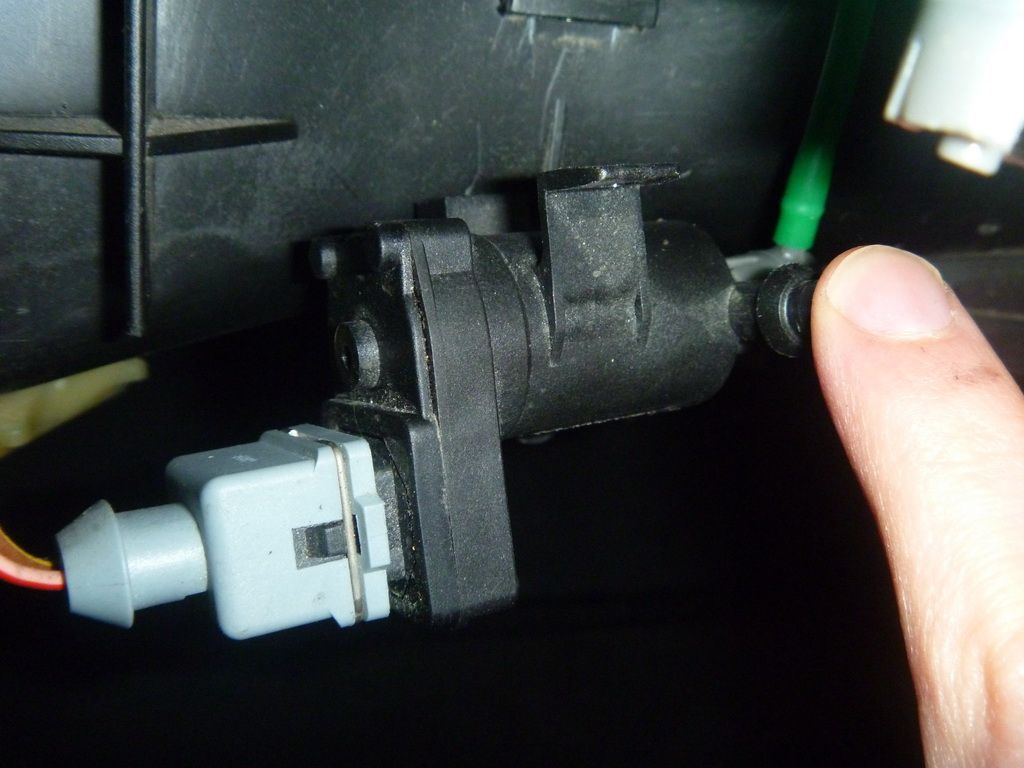
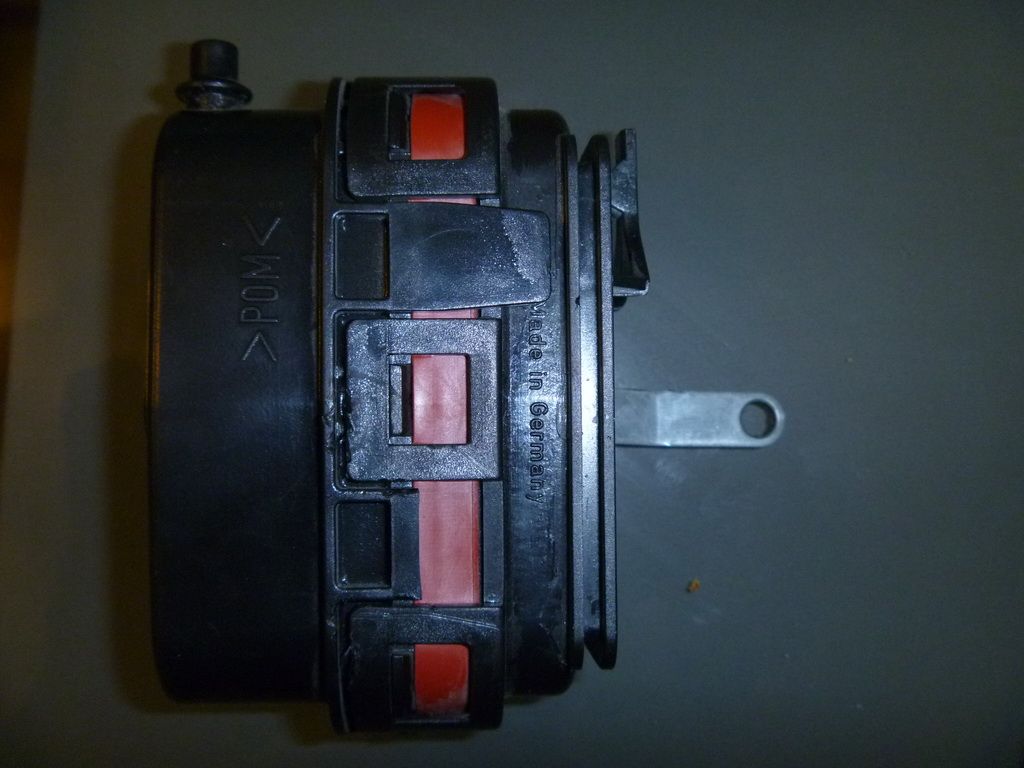
The vacuum Element:
![Image]()
![Image]()
From the picture above you may see the "fresh air" position where my housing door is stuck.
![Image]()
In addition, as soon as I started driving the "Fresh/recurc air flap switchover valve" was going nuts...click, click, click, click....
So, I disconnected the hose that connects to the element and closed the opening with my finger and it sucked it =) I mean the switchover valve worked fine: it did what it's supposed to do - sucked the air in/creating vacuum.
![Image]()
![Image]()
Now we need to replace the "Vacuum Element" and I also repaired the "housing door" while in there. It was sooo filthy and the foam rubber it was covered with just deteriorated to nothing due to all the moisture and age. I was planning to replace this stupid door... but the whole process took me forever to disassemble everything and the construction is really stupid over there... Now I understand why repair shop wanted $1200 to replace the housing that costs $40... So, I came up with another solution to fix it =) I think that was a brilliant solution, which WILL save you tons of time and effort while trying to remove the whole heater unit just to get to this stupid door...
Alright, you might not need to remove the whole upper dash like I did since it will give you just a little bit more space to play with. Also, to remove the upper dash you need to remove the upper roof molding (where you reading lights are located), side pillar covers, and driver's dash... way lots of work and it turns out there's a metal frame underneath the dash which makes things even more complicated.
So, I suggest simply removing the glove box, the vacuum tank, and then the air bag.
NOTE: Be careful, since the plastic is really fragile... and old...
Disconnect the battery before removing the air bag!!!
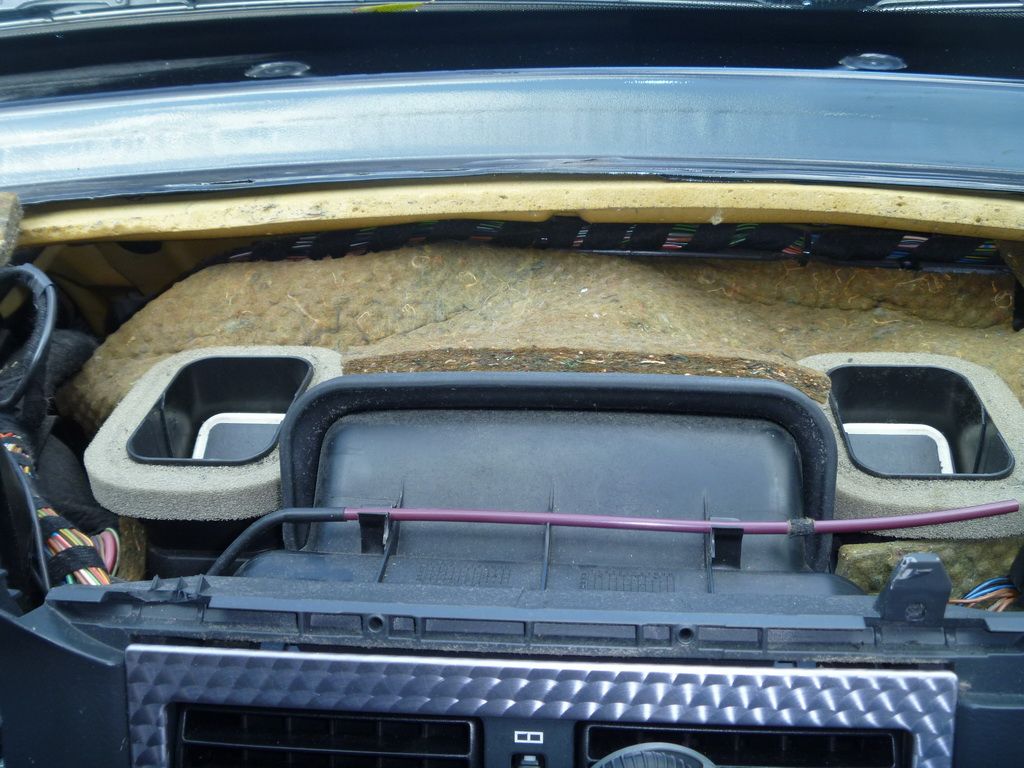
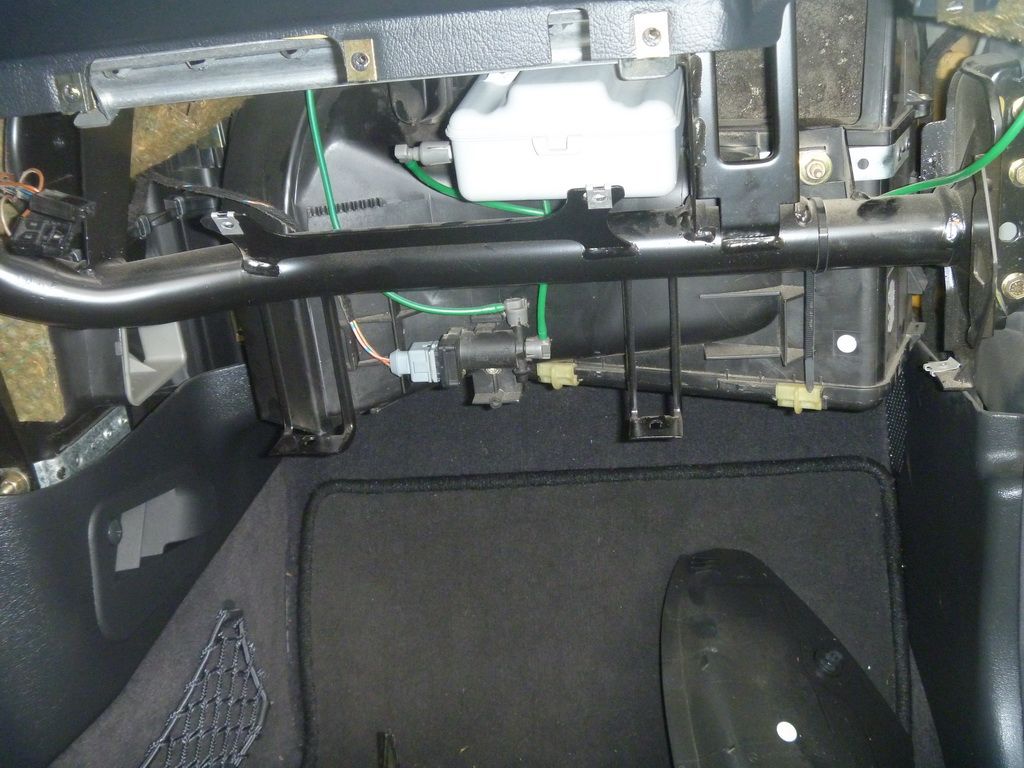
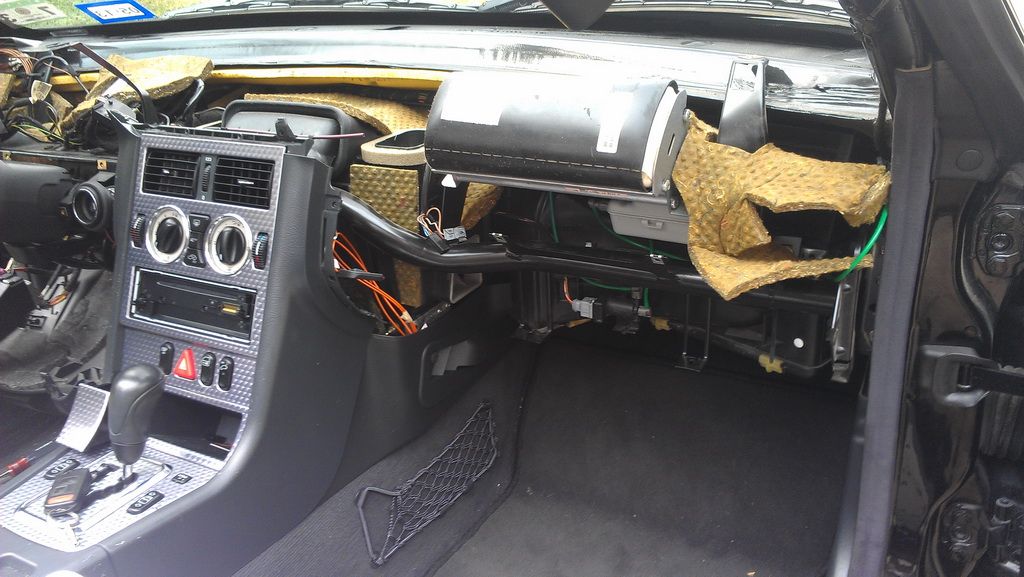
To remove the glove box you will need to remove...ah... I didn't count... about 8-10 screws... and it just drops.
Here's what you get:
![Image]()
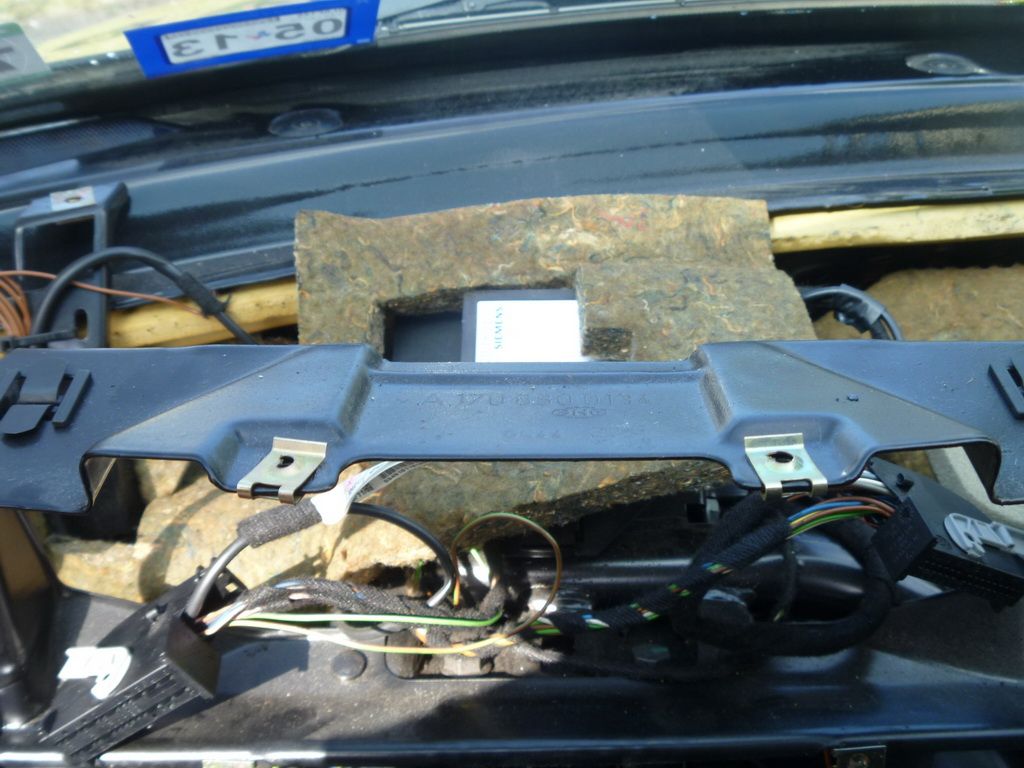
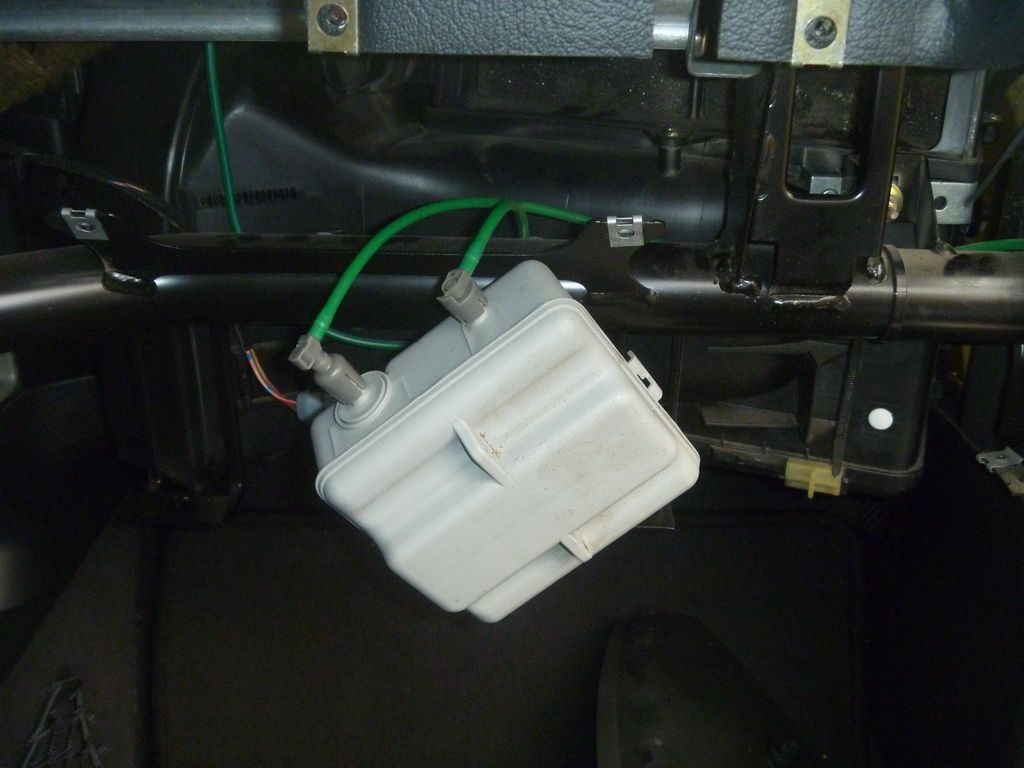
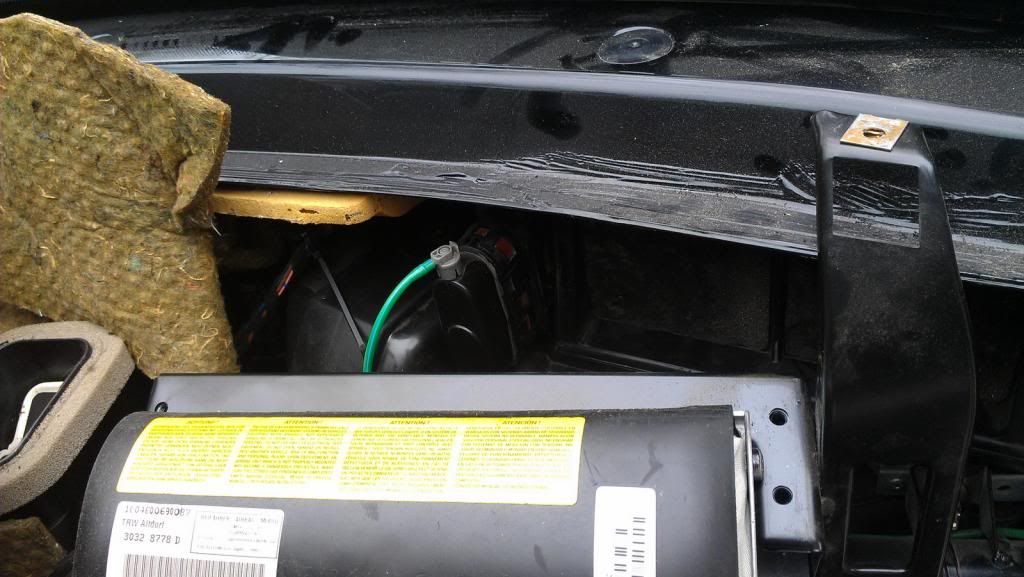
Now remove the air tank. It's held by 2 screws. Use Philips screwdriver.
![Image]()
The air bag is held by 4 bolts. As far as I remember it's either 12 or 14mm. The connector is on the left side. Since I had my dash apart I just moved the air bag to the side :biglaugh:. But you might want to disconnect the connector. Make sure the battery is disconnected!!! Risk of serious injury!!
![Image]()
![Image]()
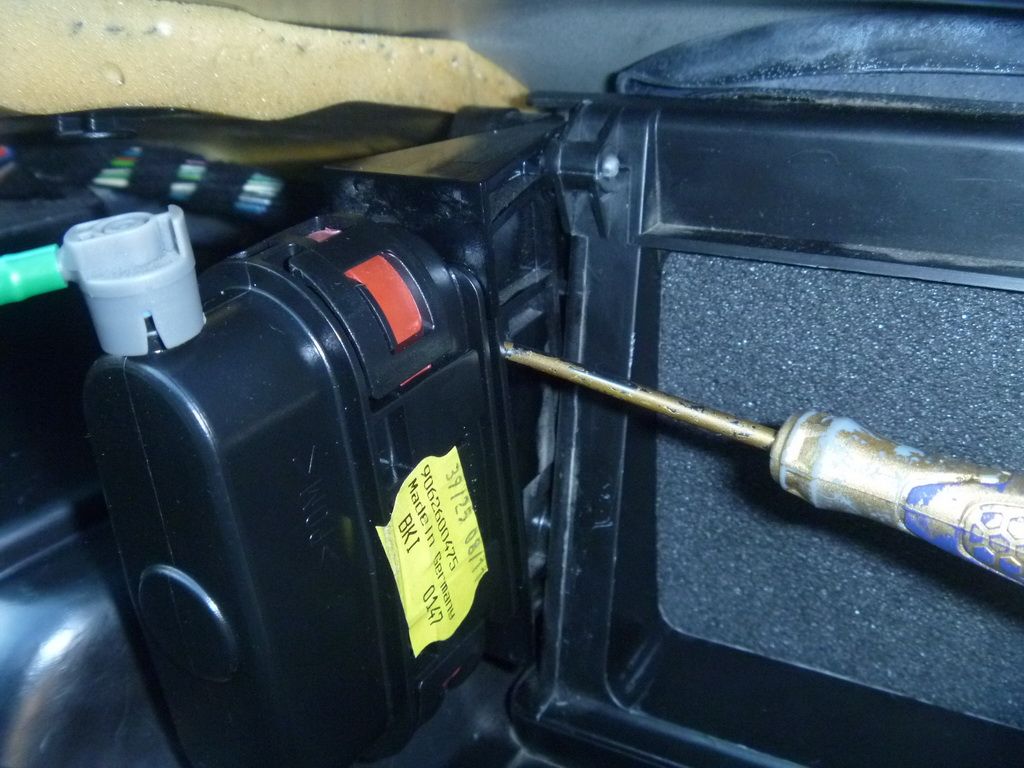
Now you have some room to play with the vacuum element. I found it easier to put a small flat head screwdriver behind it and pulling the screwdriver towards yourself to release the clip. Then carefully start turning the vacuum element counter clockwise and it will snap off! Be careful! There's a metal fastener that connects to the housing manual motor. Simply unclip it. Using a flat head screwdriver carefully disconnect the vacuum line plastic connector from the vacuum element! Be careful not to brake it or damage the green hose/line.
![Image]()
Then get you new vacuum element. Another thing that I found to be easier is to pull the metal fastener out of the vacuum element all the way so it extends and carefully snapping it on a small pin located on a manual motor.
![Image]()
![Image]()
Here's a picture of this pin. It's not mine. I took it from Ebay
It gives you the idea of where the small pin is and how this stuff works =)
![Image]()
Then position the vacuum element and click it back into place. Reconnect the vacuum line and you're good to go! Reconnect the air bag. Connect the battery and start the car. Let the air fill the air tank and try to play with the switch while watching if the housing door operates correctly.
I have mentioned the problem here:
http://www.slkworld.com/slk-r170-general-discussion/31713-what-does-first-notch-aircon-do.html
And after writing this post and posting pictures of all the stuff I could find (Hope it's useful anyways) I came up with the solution over here:
http://www.slkworld.com/slk-r170-general-discussion/11844-vacuum-leak.html
I took the glovebox apart and took some pictures. The problem that I had is that my "housing door" is stuck on "always fresh air".
On the air conditioning switch there are the following measurements: "0", "." (dot), "1", "2", "3", "4", "5".
"0" - means inside the cabin air only. It is activated by the vacuum Element.
Here's the position of the housing door at "0"
. - means fresh air circulation. It is activated by the spring, while the vacuum is being released from the element.
Here's the position of the housing door at "."
So, my flap was stuck on "." - Only fresh air.
Now, what happens is that there's a part called "Vacuum Element" (part no. 202-800-18-75) is made of rubber and over the time this rubber wears out. It causes a leak, so the vacuum is not created. There's no faulty code since this part is simply a rubber with attached metal piece to it which in its turn attaches to the small manual motor and operates it. Thus opening the "housing door" to allow fresh air or simply closing it - air inside the cabin only.
The part that pumps out the air from the vacuum element is called "Fresh/recirculating air flap switchover valve" (part no. 2028000178). This might generate a faulty code when it's out. But mine was fine. It was just going crazy, clicking all the time due to constantly sucking the air out of the faulty vacuum element.
NOTE: When you turn off the engine, the flap automatically goes into position "0" - fresh air. It is done automatically to release the vacuum and the tension applied to the vacuum element, and also to prolong its life. So my recommendation is to keep your switch in position "0", and don't turn it off all the way to "."(in cabin air only). In order to prolong the life of the element I would recommend to use "." position (in cabin air only) only when you really need it.
The symptoms:
When I was starting the car, turned the switch between these two positions, I heard a click form the "Fresh/recurc air flap switchover valve." Also, when it was in position "." - there was no sound, but in position "0" I heard a hissing sound...
Here's a picture of the "Fresh/recurc air flap switchover valve":
depicted also here:
But the "housing door" didn't open. I saw that the vacuum was there. When playing with the switch I heard a vacuum sound from this "Fresh/recurc air flap switchover valve", the lines were moving, and the "Vacuum Element" (part no. 95 on the diagram below) depicted below was moving too, meaning it was getting the vacuum. But I heard a hissing sound, meaning that the rubber developed a tear somewhere.
The vacuum Element:
From the picture above you may see the "fresh air" position where my housing door is stuck.
In addition, as soon as I started driving the "Fresh/recurc air flap switchover valve" was going nuts...click, click, click, click....
So, I disconnected the hose that connects to the element and closed the opening with my finger and it sucked it =) I mean the switchover valve worked fine: it did what it's supposed to do - sucked the air in/creating vacuum.
Now we need to replace the "Vacuum Element" and I also repaired the "housing door" while in there. It was sooo filthy and the foam rubber it was covered with just deteriorated to nothing due to all the moisture and age. I was planning to replace this stupid door... but the whole process took me forever to disassemble everything and the construction is really stupid over there... Now I understand why repair shop wanted $1200 to replace the housing that costs $40... So, I came up with another solution to fix it =) I think that was a brilliant solution, which WILL save you tons of time and effort while trying to remove the whole heater unit just to get to this stupid door...
Alright, you might not need to remove the whole upper dash like I did since it will give you just a little bit more space to play with. Also, to remove the upper dash you need to remove the upper roof molding (where you reading lights are located), side pillar covers, and driver's dash... way lots of work and it turns out there's a metal frame underneath the dash which makes things even more complicated.
So, I suggest simply removing the glove box, the vacuum tank, and then the air bag.
NOTE: Be careful, since the plastic is really fragile... and old...
Disconnect the battery before removing the air bag!!!
To remove the glove box you will need to remove...ah... I didn't count... about 8-10 screws... and it just drops.
Here's what you get:
Now remove the air tank. It's held by 2 screws. Use Philips screwdriver.
The air bag is held by 4 bolts. As far as I remember it's either 12 or 14mm. The connector is on the left side. Since I had my dash apart I just moved the air bag to the side :biglaugh:. But you might want to disconnect the connector. Make sure the battery is disconnected!!! Risk of serious injury!!
Now you have some room to play with the vacuum element. I found it easier to put a small flat head screwdriver behind it and pulling the screwdriver towards yourself to release the clip. Then carefully start turning the vacuum element counter clockwise and it will snap off! Be careful! There's a metal fastener that connects to the housing manual motor. Simply unclip it. Using a flat head screwdriver carefully disconnect the vacuum line plastic connector from the vacuum element! Be careful not to brake it or damage the green hose/line.
Then get you new vacuum element. Another thing that I found to be easier is to pull the metal fastener out of the vacuum element all the way so it extends and carefully snapping it on a small pin located on a manual motor.
Here's a picture of this pin. It's not mine. I took it from Ebay
It gives you the idea of where the small pin is and how this stuff works =)
Then position the vacuum element and click it back into place. Reconnect the vacuum line and you're good to go! Reconnect the air bag. Connect the battery and start the car. Let the air fill the air tank and try to play with the switch while watching if the housing door operates correctly.